
Get started with the API and MCP
Create an API key, make your first authenticated request to the CentralCSP REST API, and connect an AI agent over MCP.
Last update:
This is the shortest path to using the CentralCSP API: create a key, make one authenticated request, then connect an AI agent over the Model Context Protocol (MCP).
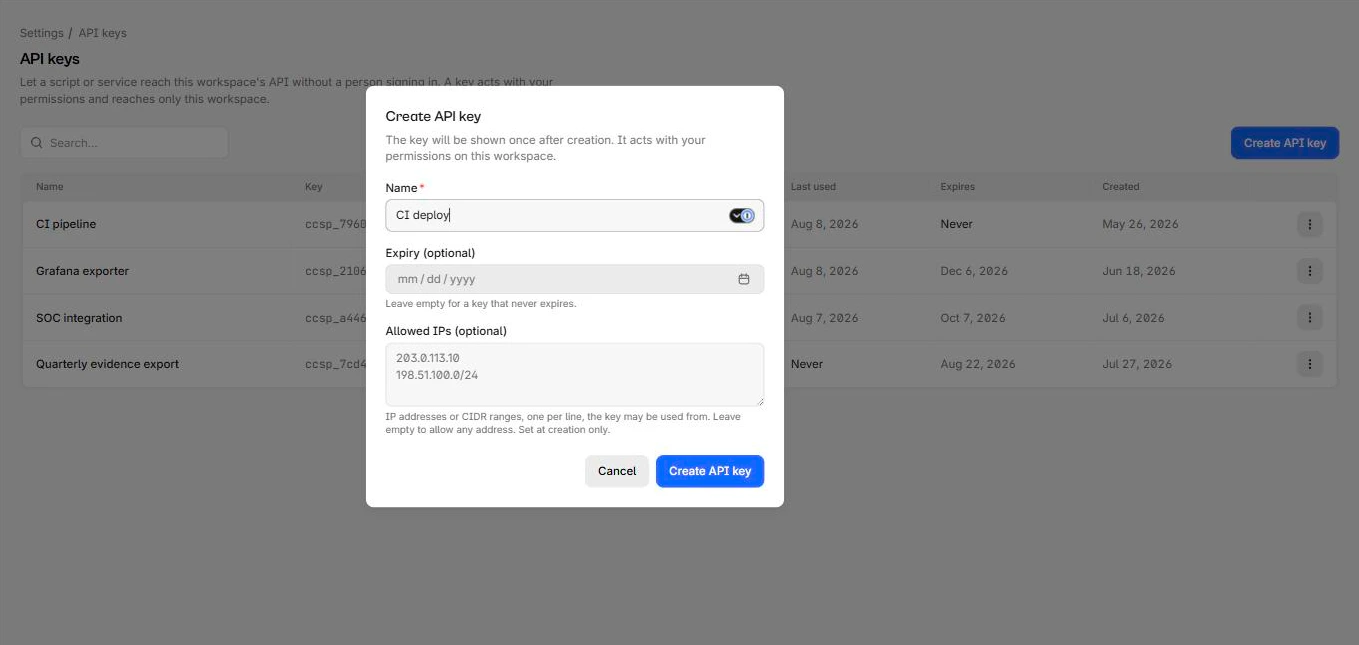
1. Create an API key
Create an API key from your workspace settings, give it a name, and store the
returned value as a secret; treat it like a password. Each key is prefixed ccsp_
and is scoped to that one workspace.
2. Make your first request
Send the key as a bearer token with each request and call an endpoint from the
reference. Requests go to the /v1 base path:
curl -H "Authorization: Bearer ccsp_..." \
  https://api.centralcsp.com/v1/workspaces
The full endpoint list is generated from the OpenAPI spec, see Reference in the sidebar.
3. Connect over MCP
To let an AI assistant query your CentralCSP data, connect its MCP client to the CentralCSP MCP server. There is no API key in that flow, sign-in is OAuth in the browser. The MCP quickstart is the short path from adding the server to reading your first reports.
Next steps
- Browse every endpoint in the API Reference (sidebar).
- Read the conceptual material (auth, rate limits, webhooks) in the API & MCP overview.
Overview
Build on CentralCSP with the REST API and the Model Context Protocol server, authentication, endpoints, pagination, and connecting an AI agent.
Overview
The CentralCSP REST API. Bearer authentication with a workspace API key, cursor pagination, per-endpoint rate limits, and the generated reference.