

Add a website
Register a site in four steps. Name and URL, what to collect, who can see it, then review. Every setting stays editable afterwards.
Last update:
Registering a website creates its reporting endpoint and gives reports somewhere to land. It changes nothing on your site, and nothing is collected until you deploy the headers.
You need the workspace Admin or Owner role to add a website. Your plan also caps how many websites a workspace can hold.
Open the wizard
Start the wizard:
- Go to Websites.
- Select Add website.
The wizard has four steps: Details, Reporting, Access, and Review. Only the name and URL are required, so you can take the defaults on everything else and adjust later under the website's Settings.
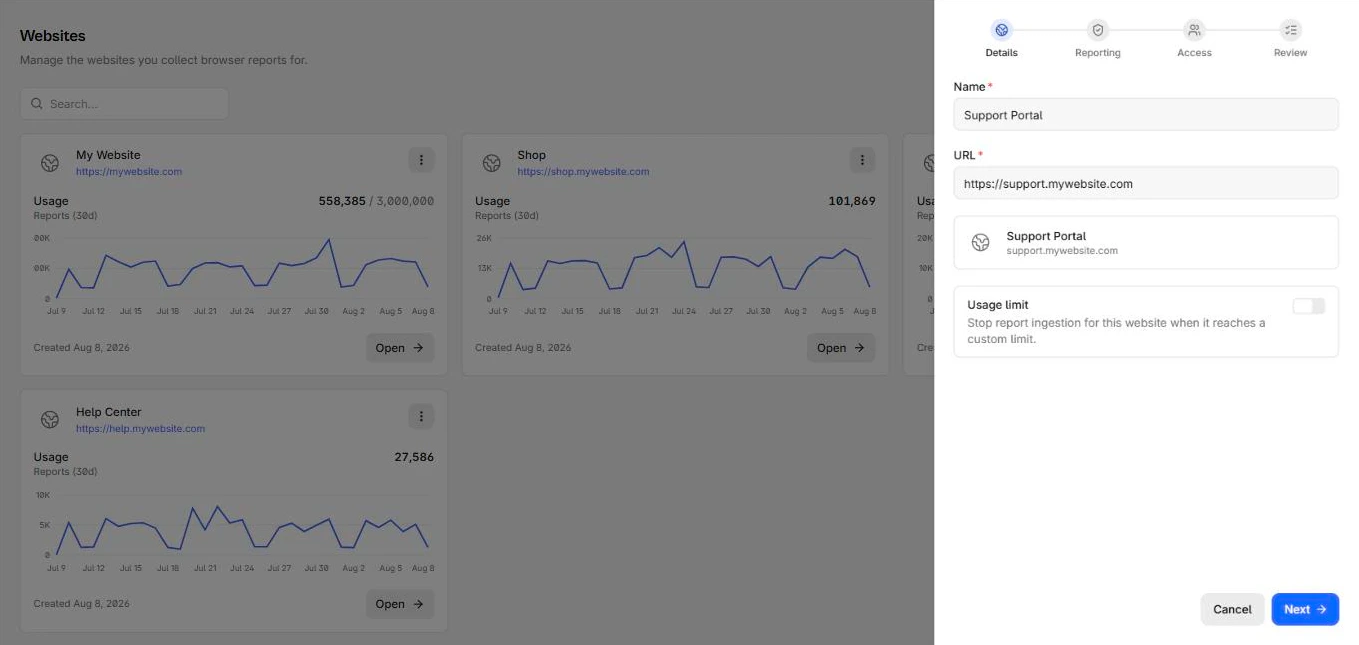
The wizard opens on its Details step:
1. Details
Give the site a Name and its public URL. The name is what you see in lists and alerts, so make it recognizable if you run several environments.
Usage limit is off by default, meaning the site draws on the workspace quota with no ceiling of its own. Turn it on to cap this one site, which is worth doing for a noisy or untrusted property so it cannot consume the whole workspace allowance. For more information, refer to Usage and limits.
2. Reporting
Allowed origins is prefilled with the URL you just entered, one origin per line. Leave the field empty and the endpoint accepts reports from any origin on the internet. Anyone who finds your endpoint URL can then post to it and consume your monthly report quota. Keeping the prefilled value is the right default.
Three privacy filters follow, all off by default:
- Drop query strings and fragments: Strips everything after
?and#from URLs before storing. Turn this on if your URLs carry tokens, session ids, or anything else you would rather not retain. - Drop referrer: Discards the referrer of incoming reports.
- Drop reports from browser extensions: Discards reports whose source is
chrome-extension://and similar. Extension noise is the single largest source of meaningless CSP violations on most sites, so turning this one on is usually worth it.
All four settings are editable later under Settings > Ingestion. For more information, refer to Ingestion filters.
3. Access
Grant individual members or whole groups access to this site, each with a website role.
You do not need to add yourself, and you do not need to add anyone who administers the workspace. Workspace owners and admins already have full access to every website. This step is for members who should reach this site and not others.
Leaving it empty is fine, and the review step says so plainly. For what each role can do, refer to Access control.
4. Review
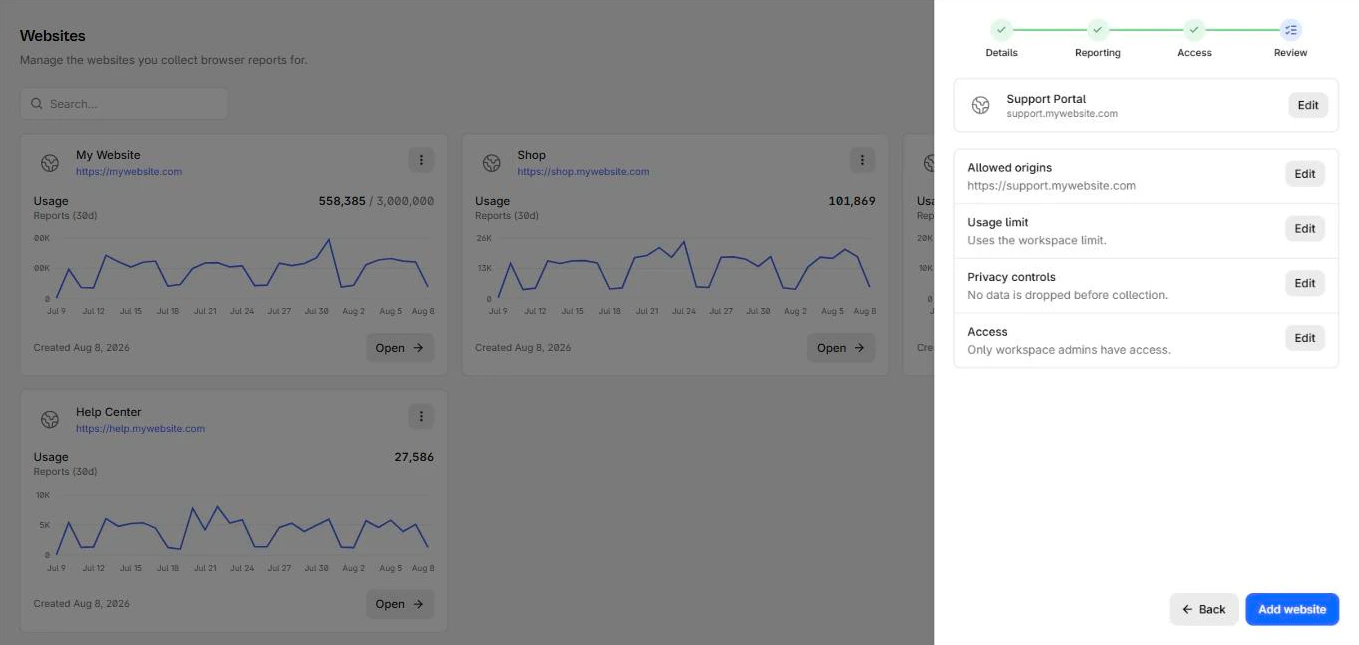
The last step summarizes what you chose, and you can go back to any step without losing anything.
Check the privacy controls before confirming. On a default run nothing is dropped before collection, which means extension noise and full URLs including query strings are all being stored. That is the setting most worth changing now rather than after a month of data.
Select Add website to create it.
The Review step repeats the privacy controls before you commit:
What happens next
CentralCSP generates a unique reporting endpoint for the site and opens it. Nothing arrives yet, because your site is not pointing at that endpoint.
Go to Setup to copy the generated headers and deploy them. That is the step that starts the flow of reports.
Next steps
The website exists and has its own reporting endpoint, but nothing arrives until you deploy its headers. Do that next.